Are you considering installing speed bumps or speed humps in your community to enhance road safety and control vehicle speeds? It’s not as simple as just placing a few obstacles on the road. The installation process involves meticulous planning, community engagement, and adherence to regulatory standards. In this detailed guide, we’ll walk you through the critical steps necessary to ensure a successful and effective installation of speed bumps and humps, from initial planning to post-installation checks.
The Installation Process for Speed Bumps and Speed Humps: What You Need to Know
Planning and Assessment
The first phase of the installation process involves thorough planning and assessment. This stage is crucial to determine the most effective locations for speed bumps and humps and to ensure that their installation will address the specific traffic issues your community is facing.- Identifying Key Areas
- Traffic Analysis: Begin by conducting a detailed traffic analysis to identify areas where speeding is a frequent issue. This might include school zones, residential streets, or areas with high pedestrian traffic. Data on traffic flow, speed violations, and accident history can provide valuable insights.
- Prioritizing Locations: Not all areas may benefit equally from speed bumps or humps. Prioritize locations based on factors such as accident history, the presence of vulnerable road users (e.g., children, elderly), and community complaints about speeding. Areas with high pedestrian activity or near parks and schools are often prime candidates.
- Community Involvement
- Engaging Residents and Stakeholders: It’s essential to involve the community in the planning process. Organize public meetings or surveys to gather feedback from residents, businesses, and local stakeholders. Their input can provide valuable perspectives on problem areas and potential solutions.
- Building Consensus: Community support is vital for the successful implementation of traffic calming measures. Transparent communication about the purpose, benefits, and potential impacts of speed bumps or humps can help build consensus and address any concerns.
Design and Materials
Once the key areas are identified and community input is considered, the next step is to focus on the design and materials for the speed bumps or humps. This involves selecting the appropriate type and ensuring durability and effectiveness.- Choosing the Right Design
- Types of Speed Bumps and Humps: There are several types of speed bumps and humps, each suited to different purposes. For example, speed bumps are generally more aggressive and suitable for areas requiring significant speed reduction, such as parking lots or private roads. Speed humps, being more gradual, are ideal for public roads where a smoother vehicle transition is desired.
- Design Specifications: Consider the height, width, and spacing of the speed bumps or humps. These specifications will depend on the desired speed reduction and the type of vehicles using the road. The design should also consider emergency vehicle access, ensuring they can pass without significant delays.
- Selecting Materials
- Material Options: The choice of material affects both the durability and cost of the installation. Common materials include asphalt, rubber, and concrete. Asphalt and concrete are durable and can handle high traffic volumes, but may be more costly and complex to install. Rubber speed bumps are easier to install and replace, making them suitable for temporary or experimental installations.
- Weather Considerations: In regions with extreme weather conditions, material choice becomes even more critical. For example, areas prone to heavy snowfall or freezing temperatures may require more durable materials to withstand the conditions.
Legal and Regulatory Considerations
Before any installation begins, it’s crucial to navigate the legal and regulatory landscape. This ensures that the installations are compliant with local laws and safety standards.- Permits and Regulations
- Obtaining Permits: Check with local government authorities to determine the necessary permits and approvals required for installation. This step is critical to ensure compliance with zoning laws and public safety regulations.
- Public Consultation Requirements: Some regions may require public consultations or hearings as part of the permit process. Ensure these are completed to avoid delays.
- Compliance with Standards
- Safety Standards: Speed bumps and humps must meet specific safety standards, including proper signage, visibility, and design specifications. Compliance with these standards is crucial to prevent accidents and liability issues.
- Accessibility Considerations: Ensure that the design and placement of speed bumps or humps do not impede accessibility, particularly for individuals with disabilities. This includes providing adequate warning signage and maintaining accessibility for emergency vehicles.
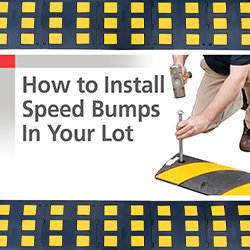
Installation Steps
With planning, design, and legal compliance in place, the actual installation process can begin. This phase involves preparing the site, installing the speed bumps or humps, and conducting post-installation checks.- Preparation
- Site Marking: Clearly mark the locations where speed bumps or humps will be installed. This includes setting out the dimensions and ensuring that the site is free of obstacles or debris.
- Community Notification: Inform the community about the upcoming installation to prevent confusion or accidents. This can be done through signs, flyers, or community announcements.
- Installation Process
- Installing the Bumps or Humps: Follow the manufacturer’s guidelines for installation. This typically involves placing the materials, ensuring they are secure, and painting or marking them for visibility. For asphalt or concrete bumps, this may also involve a curing period before they are fully operational.
- Signage and Visibility: Proper signage is crucial to warn drivers of the upcoming speed bumps or humps. Install signs well in advance of the actual bumps, and consider additional markings such as reflective paint to enhance visibility, especially at night.
- Post-Installation Checks
- Safety Inspection: Conduct a thorough inspection to ensure that the installation meets all safety standards and that the speed bumps or humps are clearly visible and properly marked.
- Monitoring and Feedback: After installation, monitor the area for any issues, such as increased noise, driver confusion, or traffic diversion. Gather feedback from the community to assess the effectiveness of the measures and make adjustments if necessary.